Website Performance
Digital Marketing Tips – How to Speed Up Your WordPress Admin Area
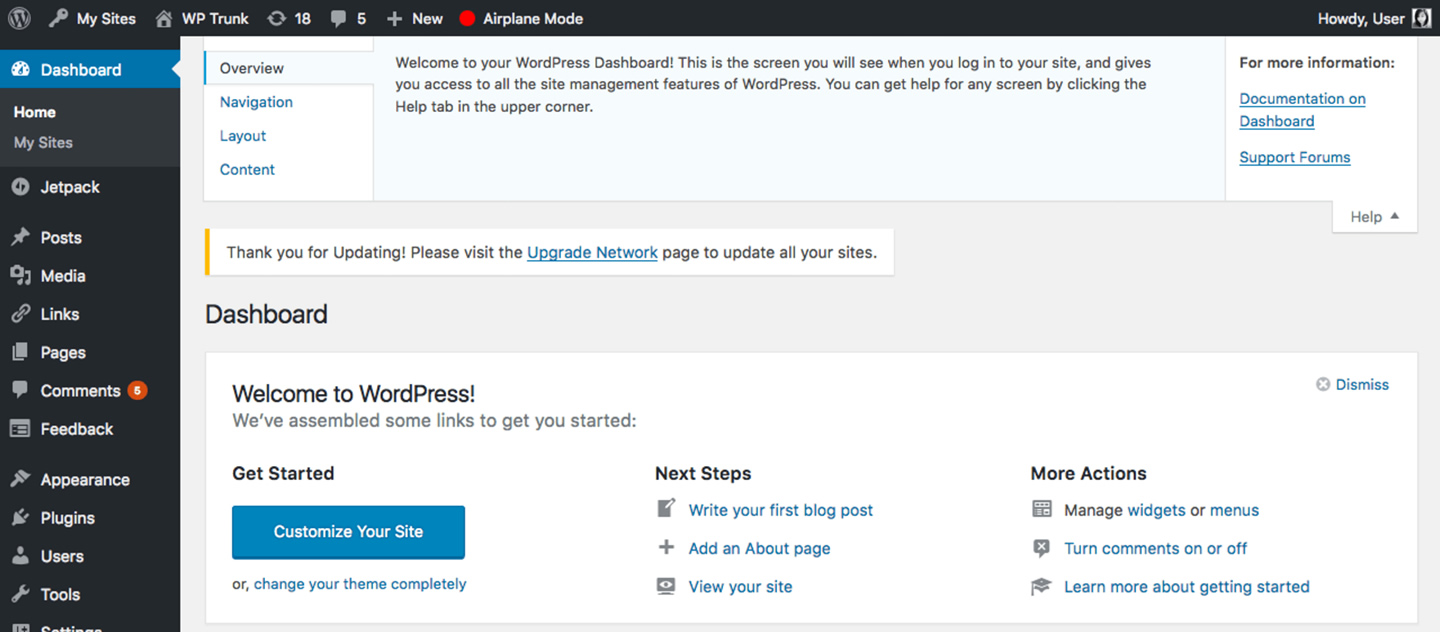
We’re going to look at how you can speed up your WordPress admin area.
There’s no doubt about it, slow loading websites are frustrating but to the person that owns a WordPress website, there is nothing worse than a slow admin area.
Not only is it irritating, it can cost you so we’re going to look at how you can speed up your WordPress admin area.
Preparation
The first step is to prepare your website – this is to ensure that you don’t lose customers while you are fixing your admin area. Some of the steps you need to take are going to affect every part of your website and visitors won’t be happy if they can’t access your site.
The best way to counteract this is to create a maintenance page. You can’t just pretend that nothing is wrong when its clear parts of your site don’t work so tell them by showing an “under maintenance” message – at least they know you are working on it!
To do this, use a plugin called SeedProd Coming Soon. It has full integration with newsletters like Aweber and Mailchimp, so your list can continue growing while you fix the site.
Review Recent Updates
Do you update plugins and themes, even WordPress itself regularly? If you don’t that is your first step. Not updating leads to security issues as well as speed problems so make a backup of your website and then update everything.
Then check to see if your admin area is any faster.
Conversely, some updates can cause problems. If you recently updated your theme or a plugin and then your admin area slowed down, it could be the update that caused it.
You should have backed up your site before you updated that plugin so restore from that backup and see if it cures the problem
Disable your WordPress Theme
If updating everything didn’t make a difference, the theme may be the problem. Disable your theme and use the default WordPress them to see if that makes a difference – if your admin area speeds up again the problem lies with your theme and it will need changing.
Disable Plugins
If the theme isn’t the problem, turn to your plugins. Disable all of them and see if it makes a difference. Then re-enable each plugin individually to see which one the culprit is. To do this without using your admin area, go through your hosting account.
- Find the File Manager in your hosting account control panel
- Find the directory where WordPress was installed
- Open the folder named ‘wp-content’
- You will see a folder named ‘Plugins’ – rename the folder so that it can’t be found by WordPress – the easiest way is to just add a letter to the end of the folder name
In your WordPress dashboard, go to the Plugins menu and there will be a message telling you your plugins are disabled.
If admin is now faster, you know that a plugin is the problem so go back to the file manager and rename the plugins folder as it was.
In WordPress dashboard, activate each plugin and test admin each time. When you find the plugin causing the problem, replace it with an alternative.
Repair/Optimize Database
Sometimes a corrupted database is the issue, so it will need to be repaired. Either use a plugin such as WP-DBManager or use the built-in repair function in WordPress, provided you are content t edit File Manager files. To do this:
- In File Manager, go to the directory where WordPress is
- Open the wp-config.php file
- At the bottom of the file, starting a new line, add this code:
‘<code> define (‘WP_ALLOW_REPAIR’, true);</code>’ - Save it but keep the file open
- Open a new browser tab and type the name of your website with /wp-admin/maint/repair.php appended.
- On the page that opens, click on Repair and Optimize Database and leave it to run. When it finishes, you will see a line at the foot of the page that says, “Repairs Complete’. Go back to your wp-config file, delete the line you added, save and close
Debug
If you still can’t locate what’s causing the problem you can use a plugin for debugging, like Query Monitor or you could find a developer to help you debug the site and find out what the issue is.


Editorial
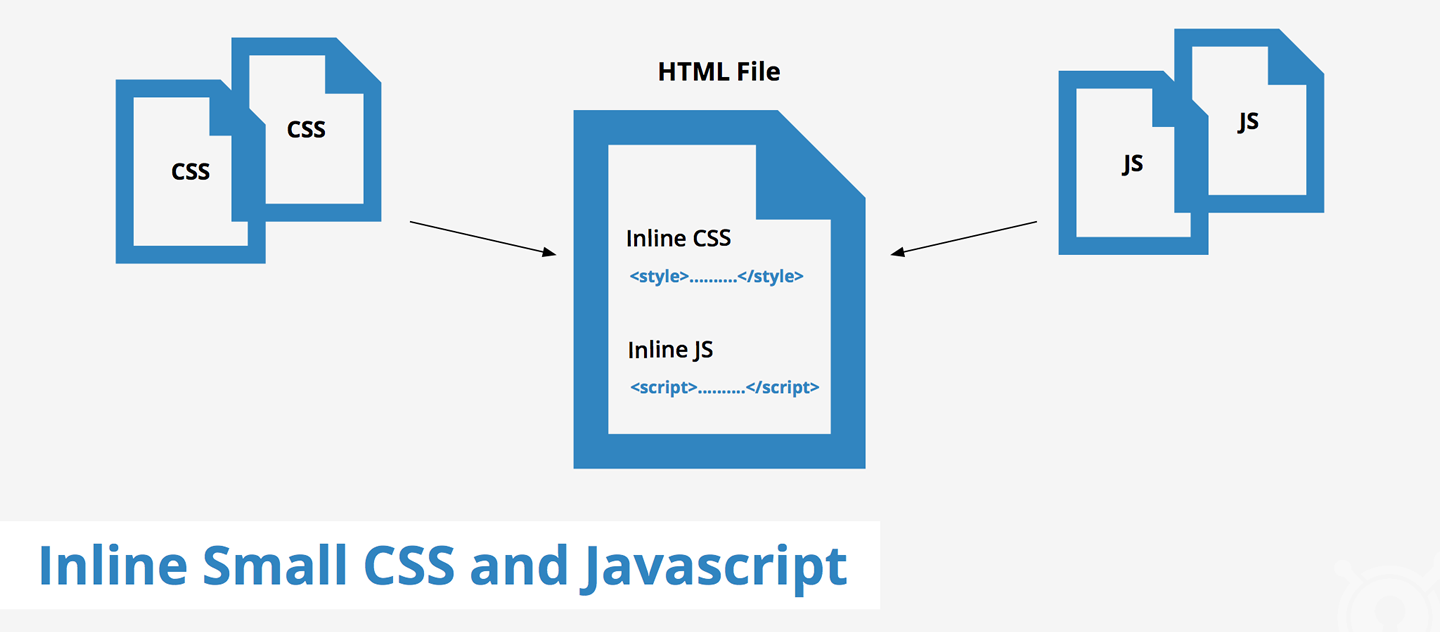
Website Performance Tip – Inline Your CSS and JS
One way to improve your page load speed is to inline CSS and JavaScript and all this means is that you include both in your HTML file.
One way to improve your page load speed is to inline CSS and JavaScript and all this means is that you include both in your HTML file.
You should have the inline small CSS inside the ‘’ tag while the inline JS can be in the ‘’ or ‘’ tag. Most of the time, best practice dictates that you should call JS and CSS using an external file, but you can include snippets of both in the HTML, saving multiple round trips, and speeding things up a little.
Many of the top site speed test tools recommend inlining CSS and JS and it is relatively easy to do. However, you do need to be careful that you don’t overdo it and inline too much.
Example of Inline Small CSS and JS
To give you an idea how to do it, this example shows you what your HTML file may look like when CSS and JS are inlined. We’ve enclosed the CSS inside ‘
‘<html>
<head>
<title>Inline Small CSS & JS Example</title>
## Start Inline CSS
<style>
body{background: #f5f5f5;}
a{color: #24890d; text-decoration: none;}
h1{font-size: 26px;line-height: 1.3846153846;}
</style>
## End Inline CSS
</head>
<body>
……
## Start Inline JavaScript
<script>
JavaScript code…
</script>
## End Inline JavaScript
</body>
</html>’
If you have got several small CSS or JS files, the code from each one may be inlined in the HTML file but do keep an eye on the overall size of the file.
Drawbacks
As with everything, there are a couple of drawbacks to inlining CSS and JS, more specifically, a tradeoff between caching and requests.
When you include the resources in the HTML file, you don’t need to make the extra requests to the resource but, where your resource file is quite large and mostly static (it doesn’t change much), it is probably best not to inline it, so the browser can cache it.
The biggest drawback of inlining is that CSS and JS can’t be cached because the browser can’t store what is in the HTML file.
This means that the entire HTML file needs to be fetched every time and, if it is full of CSS and JS, then it could be far more detrimental than retrieving the CSS or JS individually.
For this reason, you must be careful about how much you inline and don’t bloat the HTML file out.
Benefits
The benefits of inlining CSS and JS include fewer round trips thus reducing loading time so, if you some files that have only a little CSS or JS in them, it is worth adding to them to the HTML to make page loading more efficient.
This is also the recommended method to use if you want to cut down the latency caused by CSS, resulting in the critical path being optimized.
As said earlier, don’t overdo this. If the CSS and JS files are too large it is better to let them be cached rather than having to call a bloated HTML file every time.
Alternatively, if you can’t inline then another way is to combine small CSS into one external file and JS into another and call them that way – this also cuts down on round trips and boost page speed.
Optimizing Scripts
WordPress Performance Tip: Implement Full Page Caching
Every week a new caching plugin gets released but before you jump on each one to try it out, you need to understand how caching works, especially as it is multi-level.

Every week a new caching plugin gets released but before you jump on each one to try it out, you need to understand how caching works, especially as it is multi-level.
Whenever a request is sent by a user to a specific page, the reply doesn’t come straight from the website. Instead, if the data is fresh, it must be prepared from scratch and that takes time.
By the time it actually arrives with the user, the chances are they’ve gotten fed up and gone to another website.
Full Page Caching
Full page caching is done at different levels:
- Network level
- Server level
- Application level
Network Level
Two excellent examples of full page caching at network level are Cloudflare and Fastly. Both of these implement full page caching before a request even gets to the server where your website lives.
This is down to point of presence being used in multiple locations so that, when a user requests a page, the request goes via Cloudflare or Fastly, to the server.
The Point of Presence (PoP) caches the response for a predetermined time. For example, if the server sends an s-maxage cache header of 24 hours, any subsequent request for that page will be served by the PoP server for a period of 24 hours, and not the origin server.
Server Level
This type of full page caching is done by the web server or the origin server. For example, Apache uses Traffic Server, while Nginx uses fastcgi caching and proxy cache.
Application Level
There is no trickery here, its all done by WordPress caching engines and these are the most popular:
- WP Super Cache – the most popular caching engine with a few add-ons, like the integration of CDN.
- W3 Total Cache – another very popular one, with CDN integration and tends to be installed by default on many web hosts
- Batcache – a plugin that doesn’t get used as much as it should, this one does just what it says – caching. Nothing more, nothing less. There is no CDN integration, no preloading of cache, no tricks. Just pure and simple full page caching. There is a catch though; there is no file-based caching. Most plugins that offer caching generally create files that have got the cached page version in them so that when the request is made, the file is served. Batcache will create an entire full page cache and store it in WP Object Cache.
These are the best solutions available for full page caching on your WordPress website. It really doesn’t matter which one you choose, it will have the result of speeding up your page loading times and server response time.
If you choose one of the caching plugins, simply go to your WordPress dashboard and download it from there. None of them require any special configuration because they are simple plugins that do what they say on the box.
Full page caching is one of the first optimizations you should make for speeding up your website because it seriously affects the front-end experience.
Website Performance
WordPress Performance Tips – Enable Keep Alive
Keep-Alive allows a Transmission Control Protocol (TCP) connection to gain access to several files from the server to the browser, rather than having to create a connection for each new request or file.
Keep-Alive allows a Transmission Control Protocol (TCP) connection to gain access to several files from the server to the browser, rather than having to create a connection for each new request or file.
It is often termed as a persistent HTTP connection but how does it work?
Anyone who has a website knows how a web browser and server works, how they connect and coordinate every request. When you go to any webpage, the browser will create a new connection with the server and then send requests for specific files; the server gives the thumbs-up and the browser gets the go-ahead.
The browser will download that file and then another connection is made for another file, and so on.
Now, let’s suppose that your browser is requesting 10 files so that a webpage can be displayed.
That means your browser needs to create a connection for each one, that’s 10 connections and each one must be requested individually – that can really slow down the speed the webpage loads at.
Enable Keep-Alive
Enabling Keep-Alive is one way to ensure a browser creates just one connection to access every file it needs in one hit. This results in fewer requests being sent to the server, fewer server resources being used, and much faster page load speeds.
It doesn’t matter whether your website is a simple blog, or a full-on powerhouse e-commerce site loading speed is important so enabling Keep-Alive is also important.
You may find that your web host already has it enabled by default so do check with them first before you do any of the following methods.
Enabling Keep-Alive Using .htaccess
Find your .htaccess file and open it. Add the following code to it:
# TN START ENABLE KEEP ALIVE
Header set Connection keep-alive
# TN END ENABLE KEEP ALIVE
This should be added right at the end of the .htaccess fie, after the very last line and it will add a Keep-Alive HTTP header enabling the feature.
Enabling Keep-Alive in Apache
Many of the new Apache servers already have Keep-Alive enabled by default, However, if it isn’t, you need to access the HTTP Server Configuration file for your Apache server. Look for the file in
– /etc/httpd/conf/httpd.conf
And then add the following code to the file:
# Set it On to enable Keep-Alive, Off to disable Keep-Alive
KeepAlive On
# Set maximum requests per connection, set 0 for unlimited request, 100 request per connection is ideal
MaxKeepAliveRequests 100
# Set per connection timeout for next request
KeepAliveTimeout 15
Enabling Keep-Alive in Nginx
If you use an Nginx server, you will probably find that Keep-Alive has already been enabled.
If, on the slim chance, that it hasn’t, you will need to go into the core module of the server, which is called ngx_http_core_module and look for where it says ‘keepalive_disable’. Change this to read enable and you should be good to go.
Have you done this? Is Keep-Alive enabled on your website? Make sure it is and enjoy much faster loading times.

13 Steps To Building A Profitable High Traffic Technology Blog – Part five – WordPress Hosting
13 Steps To Building A Profitable High Traffic Technology Blog – Part Four – your logo

Who approved never get Hulu as an ad slogan?

13 Steps To Building A Profitable High Traffic Technology Blog – Part Three – the baby business plan

A Failure of imagination – Apple release new iPhone XR iPhone XS and iPhone XS Max
-

 Website Performance8 years ago
Website Optimization Tips – Optimizing the Order of Styles and Scripts
-

 Web Content9 years ago
How to test a copywriter
-

 Website Performance8 years ago
WordPress Performance Tips – Enable Keep Alive
-

 Research and SEO12 years ago
New Google Penguin Algorithm Update Being Rolled Out
-
 Digital Marketing Training8 years ago
13 Steps To Building A Profitable High Traffic Technology Blog – Part five – WordPress Hosting
-

 Digital Marketing Training8 years ago
13 Steps To Building A Profitable High Traffic Technology Blog – Part Four – your logo
-

 Web Content12 years ago
7 Basic Principles Of Good Writing
-
 Digital Marketing Training8 years ago
13 Steps To Building A Profitable High Traffic Technology Blog – Part Three – the baby business plan